TytoCare Integration
As of v6.1, the DexCare SDK now supports TytoCare devices during virtual visits. For more information about TytoCare and the TytoCare device, visit their website at https://www.tytocare.com
TytoCare is enabled/disabled based on a DexCare server side config. There is no client-side config to enable or disable the integration.
The TytoCare integration is mostly contained within the SDK and no setup is required on the app for it to function. The documentation on this page will be primarily explaining how it works.
Setup
-
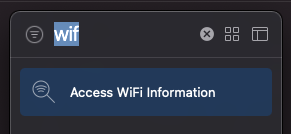
While not necessary, iOS requires 2 permissions in order to automatically get the WiFi name the current device is on. Without these permissions, the user will have to manually enter their WiFi network name.
WiFi Entitlement
Apps will need to be built with the WiFi entitlement turned on. Project > Target > Signing & Capabilities and add in the Wifi Entitlement
Location (with precise location)
The SDK Will request the device’s location with precise location turned on. If the user declines location, or does not allow precise location, the client will have to manually enter their WiFi Network name
Make sure you have set your
Privacy - Location When In Use Usage Descriptionin your info.plist. -
The
ACCESS_FINE_LOCATIONpermission will be added to your Manifest file automatically upon consuming the new SDK version.The permission is requested inside the SDK/virtual visit when required. The user has the option to deny permission and enter the SSID manually.
No additional setup is necessary for Android.
Optional Configuration
The SDK now has a new method DexCareSDK.setCustomizationOptions that allows setting various optional config values.
One of the properties of the CustomizationOptions is a TytoCareConfig. It contains:
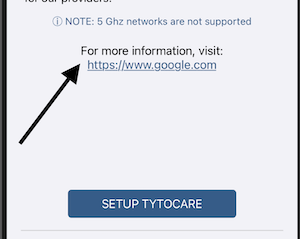
helpUrl: URLWhen set, this URL will be shown to the user inside the TytoCare flow, allowing them to view more information about how TytoCare works.
If set a section on the TytoCare setup sheet will be displayed. Note: This URL will open outside of DexCare, and you may have to resume a visit once returned.
Pairing the TytoCare Device
The first time a patient uses the TytoCare Device with your app, they will need to pair it. If a device has been paired elsewhere outside of DexCare, the patient will need pair it again, even though the device may be on the same WiFi network. Pairing the device requires collection of the WiFi SSID (network name) and WiFi password.
A new TytoCare button is shown on the waiting room and conference screens. Clicking it will open a bottom sheet that contains the entire TytoCare device pairing flow.

In the case the user denies location permission, the user will be required to manually type in the SSID.
After the WiFi SSID is collected, the SDK will then collect the WiFi password from the user. The user is required to manually type the password in each time the device needs to be re-paired.
For obvious security reasons, the SSID and password never leave the device, and are only used to generate a QR code.
After both the SSID and password are obtained, the SDK will generate a QR code that will need to be scanned by the TytoCare device. Upon scanning the QR code, the TytoCare device will connect to the specified WiFi network.
The TytoCare device will display a success/failure notification on the device’s display. Upon failure, the user has the ability to generate another QR code after changing WiFi SSID or password.
The TytoCare device and patient’s device need to be on the same WiFi network for successful pairing. Once paired, the phone can connect to a different network if desired.
Using the TytoCare Device
In order for the provider to control the ability to interact with the TytoCare device, the patient must select Join Online Visit on the device first. Once the device is connected to the virtual visit, the Provider can guide the patient through using the device.